Table of Content
To start making the scarf, you need to pick a lightweight and suitable fabric. There are many fabric types available for making scarfs, such as Cashmere, silk, satin, Pashmina, cotton voile, rayon, etc. Learning how to make a scarf at home is an easy DIY project that anyone with little to no sewing skill can try. Satin scarves are also easy to wash and care for. This fabric won’t be good for you if you are new to sewing as it is slippery and difficult to sew. A scarf can protect us from cold, sun, and wind while helping us look stylish.
They are simple yet elegant and give you a crisp appearance. Cape scarf is a style statement and is easy to sew at home if you get the right instructions. Choose this regular and simple scarf sewing pattern. Starting at one corner, sew the ribbon or ricrac on.
Craft This Simple Tiered Felt Tassel Scarf
These printed and colorful scarves would make a gorgeous hairband for summer when you want to tie your hair up. The college-going girls can craft a stylish and cool bag out of a no more in use scarf for a cute possession. Finally, you can make your walls speak a volume with some artistic scarf frames added to any wall of the house. So go through the following round-up to choose your favorite 25 Ways To Make A Scarf . Sew the folds using your needle and thread or sewing machine to keep it in place and get rid of any raw edges that may have shown up from cutting fabric.
It's Always AutumnThis DIY scarf is one of the easiest on the list to complete and would coordinate with a number of styles. The tutorial involves cutting a piece of fleece to size then adding on a yarn fringe on the ends. Experiment with different colors and thicknesses of yarn for varying results.
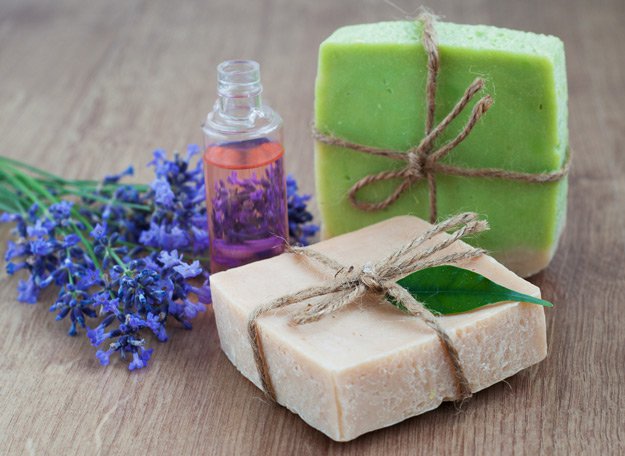
How To Make Scarfs – 9 Best Fabrics
Here are some of the best fabrics you can use when learning how to make scarfs. Upcycling clothes such as hooded jackets, hoodies, sweatshirts, etc., and cutting the fabric to make space for pockets. Just throw some fabric on your shoulders and make a bow-type style.
Wrap the long section of scarf around the back of your head. Take the long, dangling portion of your scarf and finish looping it around the back of your head. Bring it back to the right side of your head, where the shorter, left section of your scarf is. Don’t pull too much—the left side of your scarf needs to be long enough to wrap beneath your chin. Cut a coffee filter in half to create a base for your mask. Search in your pantry for a generic coffee filter that you’d use to brew a pot of coffee.
How to Make an Easy Scarf: 9 Amazing Scarf Sewing Patterns
Sew around the tube leaving a 3 inches (7.6 cm) gap. Take the tube to the sewing machine and sew a straight stitch along the edges of the tube. You will need this opening to turn the fabric right-side out. All you need to do is some cut and sewing work on them. You can first turn them into funky wear like a tee-shirt, a tunic dress, a jacket, and a shrug. Then you can turn them into some useful and beautiful house decor items like curtains, quilt, and pillows to renew the bedroom embellishing at no cost.
You can use an old, lightweight sweater to do this, or you can purchase some knit fabric. Measure and cut several 4 in wide strips from your fabric. The more strips you use to create your long strip the better. You will be bunching it up, so it is best to have lots of material to ensure a long scarf. Lay out your scarf on a flat surface and angle the fabric so it looks like a diamond. Fold the top or bottom half of the scarf so the corners and edges line up, creating a large triangle.
A rotary cutting mat marked with a 45-degree angle is handy but not necessary. Using a ruler, draw a diagonal line between the two points where the farthest press lines intersect, as shown below. Your fabric strip may have some raw or even frayed edges that will require a hem to keep them from unraveling further. Use your sewing machine to sew a zigzag stitch along the edges of your fabric strip after you have connected all of the pieces. To finish up your infinity scarf, sew up the open area using a needle and thread. Thread a needle with about 30 inches of a color of thread that matches your fabric.

The coffee filter acts as an impromptu filter for the mask. If you don’t have any on hand, you can use a scrap of leftover flannel material. For this type of replacement, cut out a strip that’s about 7 in long and 3 in (7.6 cm) tall. Honestly WTFTo complete this project, you'll need one skein of soft yarn, some leather straps, and velcro. The look is inspired by designer Rike Feurstein, who created a deconstructed yarn scarf for their collection. Not only is this the easiest scarf to create on this list, but it will also make the largest statement even though it is so minimal.
This will keep the scarf ruffled on the ribbon.Another option is to tie the ends of the ribbon together to secure the scarf. This will turn the ruffle scarf into an infinity ruffle scarf. Line up the edges of the strips so that they are overlapping and then use your sewing machine to sew a straight stitch across the strips. Sew across the area where the strips overlap each other 2 times to secure them together. Repeat this to attach all of your strips in one continuous strip.Cut the excess thread after sewing each segment.
The sewing is easy enough for beginners and the end result looks like something out of a high-end boutique. To square fabric means finding the straight grain of the fabric. Fabric is easiest to square if it still has the selvages. The selvage edges of the fabric are woven into the long edges by the manufacturer to ensure that the fabric does not unravel.
Square your fabric by finding two perpendicular grain lines. For your first line you will use the selvage, a ripped edge, or pull a thread to find the grain line. For the second and perpendicular line you will use a ruler. You have a finished head scarf and now you are ready to take it to the barn, if you dare get your cute new scarf dirty.
If you preshrink your fabric first by washing it is up to personal preference. If you sew the scarf without preshrinking then the stiches may become bunched, or the fabric will become unsquared. However, some sewists and especially quilters find working with unwashed fabric easier. If you sew clothing, you should always preshrink your fabric. I preshrink my cotton fabric 95% of the time but did not do so for this project. Next, take the ribbon that you want to use to create the ruffled effect and thread it through the eye of a yarn needle.


No comments:
Post a Comment